Rough Planing / Radiusing a Fingerboard Billet
Rough Planing / Radiusing the Billet
Over the past few years, we have encountered an increasing number of luthiers who inlay dots, logos and artwork into the billet before rough planing (or radiusing). One advantage of this order of operations is that, if an inlay element is damaged, or comes loose during the roughing operation, there may be enough material left to make repairs without having to scrap the entire billet. Modern solid carbide tools are easily capable of machining hardwood, mother-of-pearl, gold, silver, reconstituted stone, brass and plastics at the same time.
For a discussion of coding and tool selection considerations, watch this portion of David Weiland's CAM Tutorial.
- First decide how much stock allowance will remain after the roughing pass and calculate how deep this initial cut needs to be.
- typically the stock allowance between the rough-cut surface and the final, smooth, finished surface is in the range of 0.005" (0.125mm) to 0.015" (0.381mm)
- The next step is to calculate the feed rate that will be used in the roughing operation. This will depend if you are cutting a "raw billet" or one that has been inlaid with mother-of-pearl (MOP) or any other hard or brittle material. The calculations below assume the a 3-flute planing / radiusing bit will be used.
- Raw Billet (or billet with resin, plastic or wood inlays)
- Calculate the feed rate using a TOTAL chipload of 0.0105" (0.267 mm) to cut the billet down to the stock allowance in a single pass.
- To determine your feed-rate, simply multiply the total chipload by the RPM of your spindle.
- For example, if your spindle is turning 24,000 RPM, use a feed rate of 24,000 X 0.11" (0.28 mm) = 252 IPM (inches per minute) (6.4 M/min).
- This may sound pretty agressive but these tools are designed to 0.25" (6.35 mm) deep per pass at high chip loads and still produce a smooth, chatter-free surface.You might also find that you get a better surface finish with a higher feed rate.
In no case should you use a total chipload less than 0.006" (0.15 mm) because you may be operating very near the "burn point" where too much heat is being generated and not enough is being carried away by the chips being ejected from the cut. - Set the stepover to 0.023" (0.57 mm)
- Billet with MOP and/or Other Hard or Brittle Inlays
- Calculate the feed rate using a TOTAL chipload of 0.0079" (0.200 mm) to cut the inlaid billet down to the stock allowance in a single pass.
- To determine your feed-rate, simply multiply the total chipload by the RPM of your spindle.
- For example, if your spindle is turning 24,000 RPM, use a feed rate of 24,000 X 0.0079" (0.20 mm) = 190 IPM (inches per minute) (4.8 M/min).
- The reduced chipload will minimize the potential for damaging the inlay but still insure adequate heat removal to protect the billet and the tool.
In no case should you use a total chipload less than 0.006" (0.15 mm) because you may be operating very near the "burn point" where too much heat is being generated and not enough is being carried away by the chips being ejected from the cut. - Set the stepover to 0.023" (0.57 mm)
- Enter the RPM, calculated feed-rate and stepover into the CAM software (usually in the tool library) and generate the roughing toolpath.
- Load the toolpath into the CNC controller.
- Set the Z=0 point about 1" (25mm) above the billet and run the code in the air to make sure there are no mistakes or surprises.
An "air pass" is a VERY good idea if you are working with a billet with expensive inlay already installed! .
Things to watch for include: - The spindle turns on and is turning in the right direction at the specified RPM.
- The toolpath stays within the edges of the billet, avoids any clamps or hold-downs and does not include any unexpected moves.
- The tool returns to the specified HOME position and shuts off the spindle when the toolpath is finished.
- Find a convenient spot on the billet to set the Z=0 (Z-zero) position on the top surface.
- Retract tool to a safe distance.
- The system is now ready to plane, or radius, the billet.
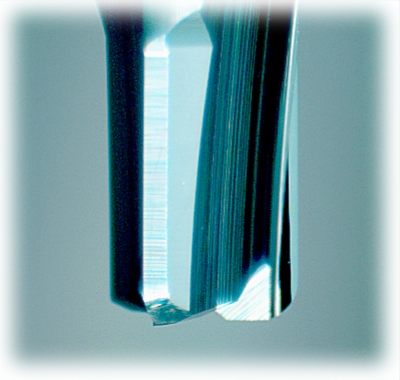
3-flute Planing / Radiusing Bit
Rough planing a fingerboard
Rough radiusing a fingerboard
video courtesy of D. Weilland, Dark Art Guitars

