Removing Debris from Carvings and Engravings with the FuzzBrush
No matter how sharp a tool you are using, and we make some of the sharpest on the market, there will always be some materials that want to leave behind hairs, splinters and ribbons of debris that must be removed before additional finishing can proceed. This debris serves to "soften" the otherwise sharp edges of the image and can adsorb excess stain, leading to a splotchy, irregular finish. Woods like poplar, cedar, white pine and even red oak are notorious for leaving this difficult to remove detritus behind. 3D carving in acrylic and Corian can be equally problematic.
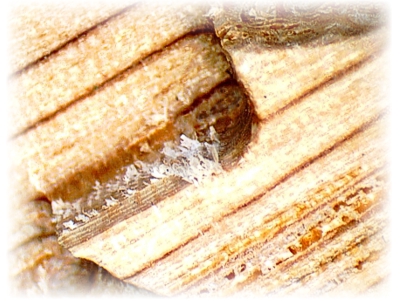
One of the most popular uses of CNC routers is the creation of very detailed 3D bass-relief images with a myriad of deep, narrow recesses. Some of the features in these carvings are so small that they are virtually impossible to remove using sand paper or abrasive "wool" (like ScotchBrite®).
A really patient person could remove the hairs using a carbide pick or Xacto® knife, I suppose, but, I can assure you that, in that direction lies insanity.
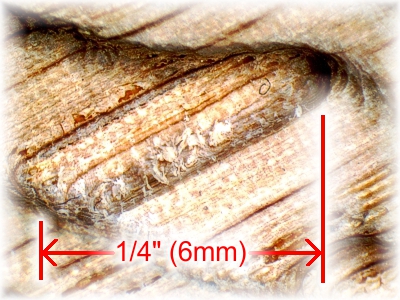
The problem gets exponentially worse when trying to clean out very small, totally enclosed features that cannot even be reached with a miniature rotary brush. In a reasonably sized carving, removing these hairs in preparation for finishing can end up taking longer the actual machining.
Making the situation more difficult, this material must be removed without damaging the underlying image. Smooth areas must remain smooth and sharp edges must remain sharp. Any process that is so aggressive that it eats away the features and details that you have spent so much time carving, simply should not be used.
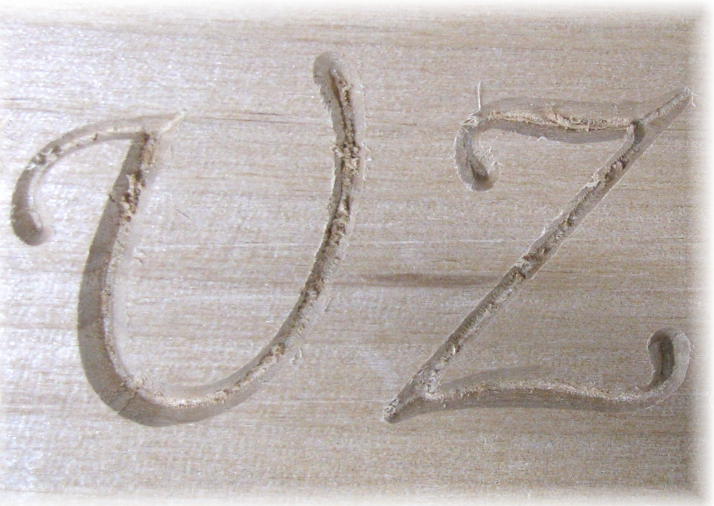
When using woods like poplar and cedar, attached chips and top surface fraying can even occur in V-kerf engraving of letters, numbers or line art. Removing this debris is essential for creating a crisp, uniform image. As above, using any process that rounds off, or wipes out the top edges and fine details of the engraving must be avoided.

Using the FuzzBrush to remove the attached debris from engravings and carvings is very straight forward, but certain precautions must be observed:
- Never use your brush to clean metal, electrical connections or any item that might introduce dirt or oil into the bristles. This will inevitably transfer to your workpiece, staining, and possibly ruining the image.
- Before each use, test the brush on the sharp edge of a piece of light wood to make sure that the brush is clean and will not leave a dark deposit on your artwork.
- Vary the pressure of the brush based on how hard your material is. Using the same scrubbing pressure on balsa wood that you use on hard maple is very likely to damage the softer material.
- Do not use the FuzzBrush, or ANY metal brush, on shiny (specular) surfaces since the sharpened ends of the bristles are likely to produce undesirable scratches and marring.
As shown in the video below:
- Use a combination of linear and rotary scrubbing motions to get into every nook and cranny of your work piece. That is why we designed the FuzzBrush with variable length bristles in each tuft. This design allow far deeper penetration than bristles that are all the same length.
- As you are scrubbing the artwork, watch as the details start to emerge. Continue brushing until the hairs and debris are no longer visible.
- Stop scrubbing when you can no longer see any artifact that obscures or dulls the carved or engraved image.
- If necessary, as a final step, brush flat or smooth surfaces with the grain to remove any cross-scratching prior to staining.
- Use compressed air to totally remove the material the FuzzBrush has broken loose before proceeding with further processing.