Finish Planing / Radiusing a Fingerboard Billet
Finish Planing / Radiusing
The goal of the finishing cut is to create a surface that is smooth and free from cutting artifacts. At this stage in the process, it is very likely that all of the inlay (if any) has been installed and the fret-slots are cut and ready for wire insertion. With careful selection of the stepover and chipload (depending on the billet material) a surface can be cut that is smooth enough to see the reflection of the bit (see attached video) as it cuts the next stepover.
As with the roughing pass considered earlier, the tool of choice will be a 1/8" (3.18 mm) diameter 3-flute planing / radiusing cutter designed specifically to cut finished surfaces that, in many cases, do not need sanding or polishing.
- Calculate the feed rate using a TOTAL chipload of 0.0079" (0.200 mm).
- To determine your feed-rate, simply multiply the total chipload by the RPM of your spindle.
- For example, if your spindle is turning 24,000 RPM, use a feed rate of 24,000 X 0.0079" (0.20 mm) = 190 IPM (inches per minute) (4.8 M/min).
In no case should you use a total chipload less than 0.006" (0.15 mm) because you may be operating very near the "burn point" where too much heat is being generated and not enough is being carried away by the chips being ejected from the cut. - Set the step-over to 0.017" (0.44 mm). You may want to experiment with the stepover to get the smoothest possible finish.
Things to watch for include:
- The spindle turns on and is turning in the right direction at the specified RPM.
- The toolpath stays within the edges of the billet, avoids any clamps or hold-downs and does not include any unexpected moves.
- The tool returns to the specified HOME position and shuts off the spindle when the toolpath is finished.
3-flute Planing / Radiusing Bit
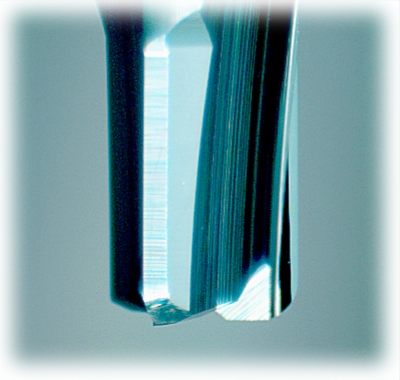
Finish radiusing a fingerboard